

Tensile3D's 3D Tiles Exporter is an Autodesk Navisworks plugin that turns BIM / coordination models into 3D Tiles (glTF / GLB tilesets) for streaming in Cesium, our companion viewer, and other 3D Tiles clients.
It is designed for very large file export and viewing— hospital campuses, plants, ships, and infrastructure models that are impractical as a single mesh.
Preview a tileset in the free Tensile3D 3D viewer— drop the tiles folder (and optional model-tree.json). Files stay in the browser.
Need a license or evaluation help? Email tensile3d@gmail.com. License terms.
Download on Autodesk App Store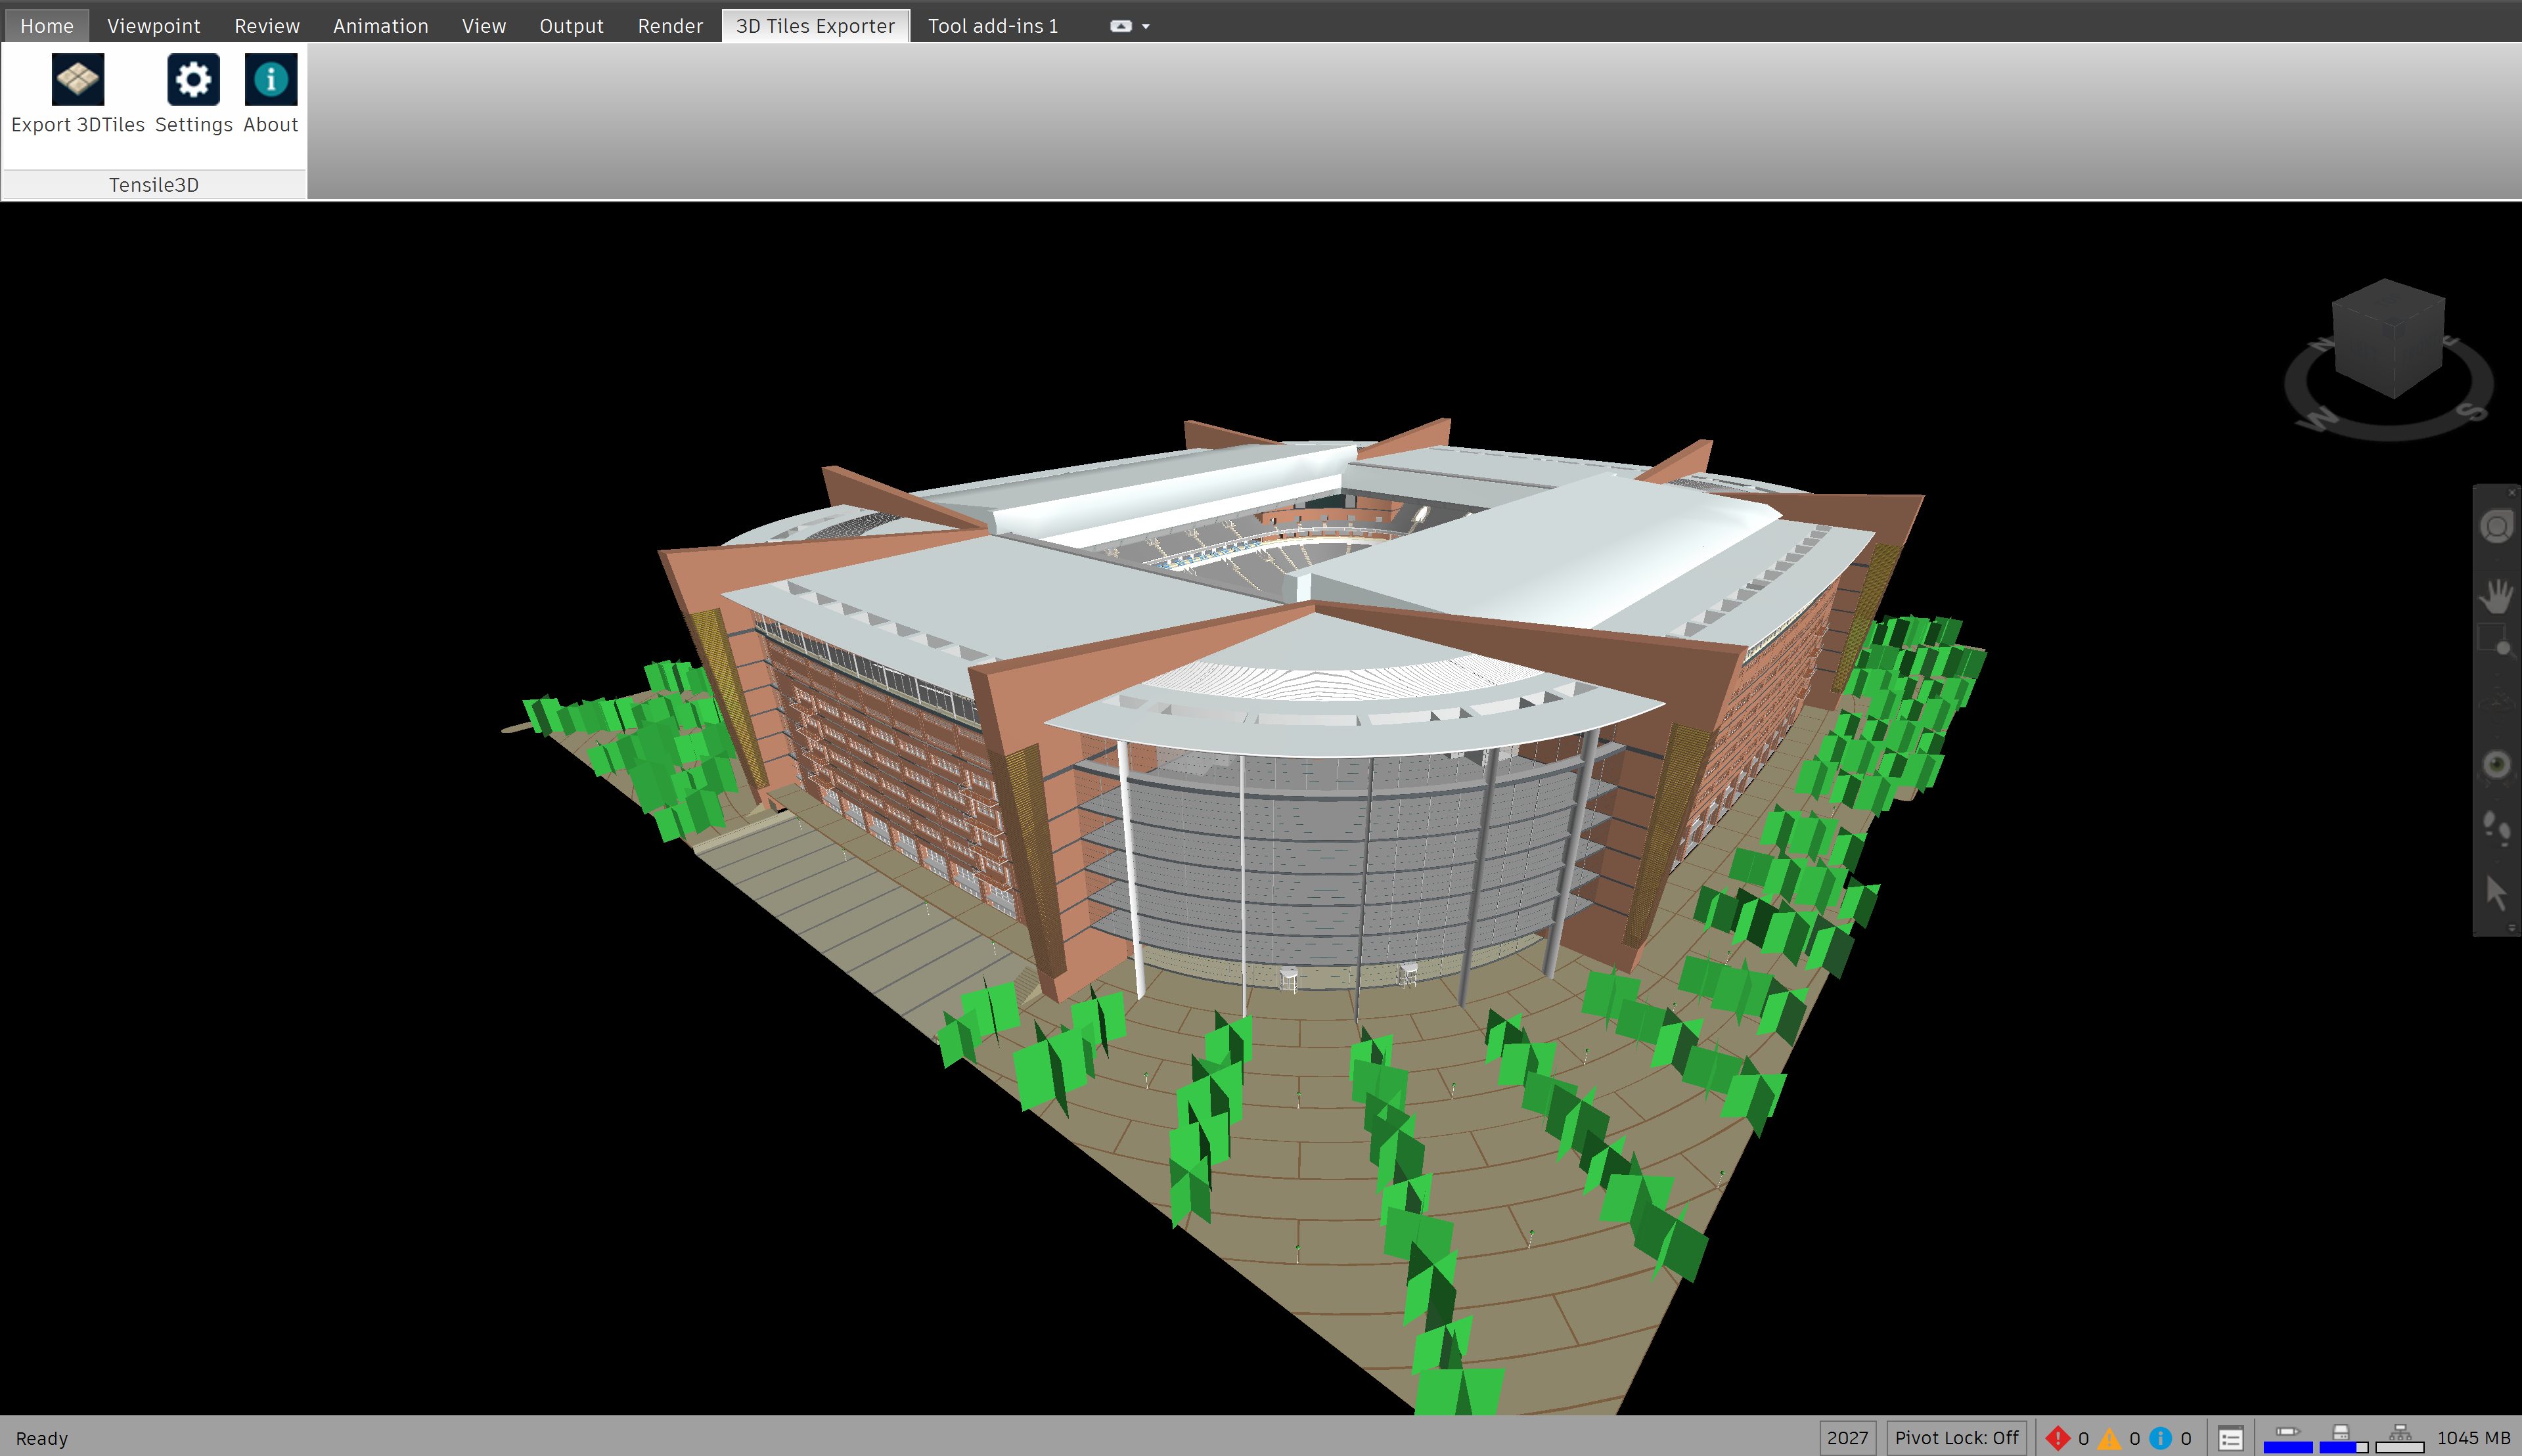
Streamed viewing of a large exported tileset
Features
Built for very large models
Export and view massive Navisworks projects as streaming 3D Tiles. Geometry is split into tiles so web and Cesium clients load only what is needed — without opening the whole model in memory at once.
Smart or grid tiling
Use smart octree tiling that densifies where geometry is heavy, or set a fixed Height / Width / Length grid. Optional triangle-budget leaves keep tile sizes predictable.
Material-batched GLB leaves
Leaf tiles are efficient glTF / GLB meshes. Batch by material for fewer draw calls, or keep items separate for easier picking.
Origin & axis controls
Move the model origin to 0,0,0 (or any XYZ), flip Y/Z for glTF viewers, export normals, skip hidden items, and clip to section boxes.
Companion 3D Tiles viewer
Save the Tensile3D viewer from Settings, drop your *_tiles folder into public/tilesets, and stream the export locally with Three.js or Cesium.
Trial & licensed activation
A 15-day trial starts on first run. Activate a perpetual or subscription license from the About dialog. See license terms for seats, offline use, and deactivation.
Export settings
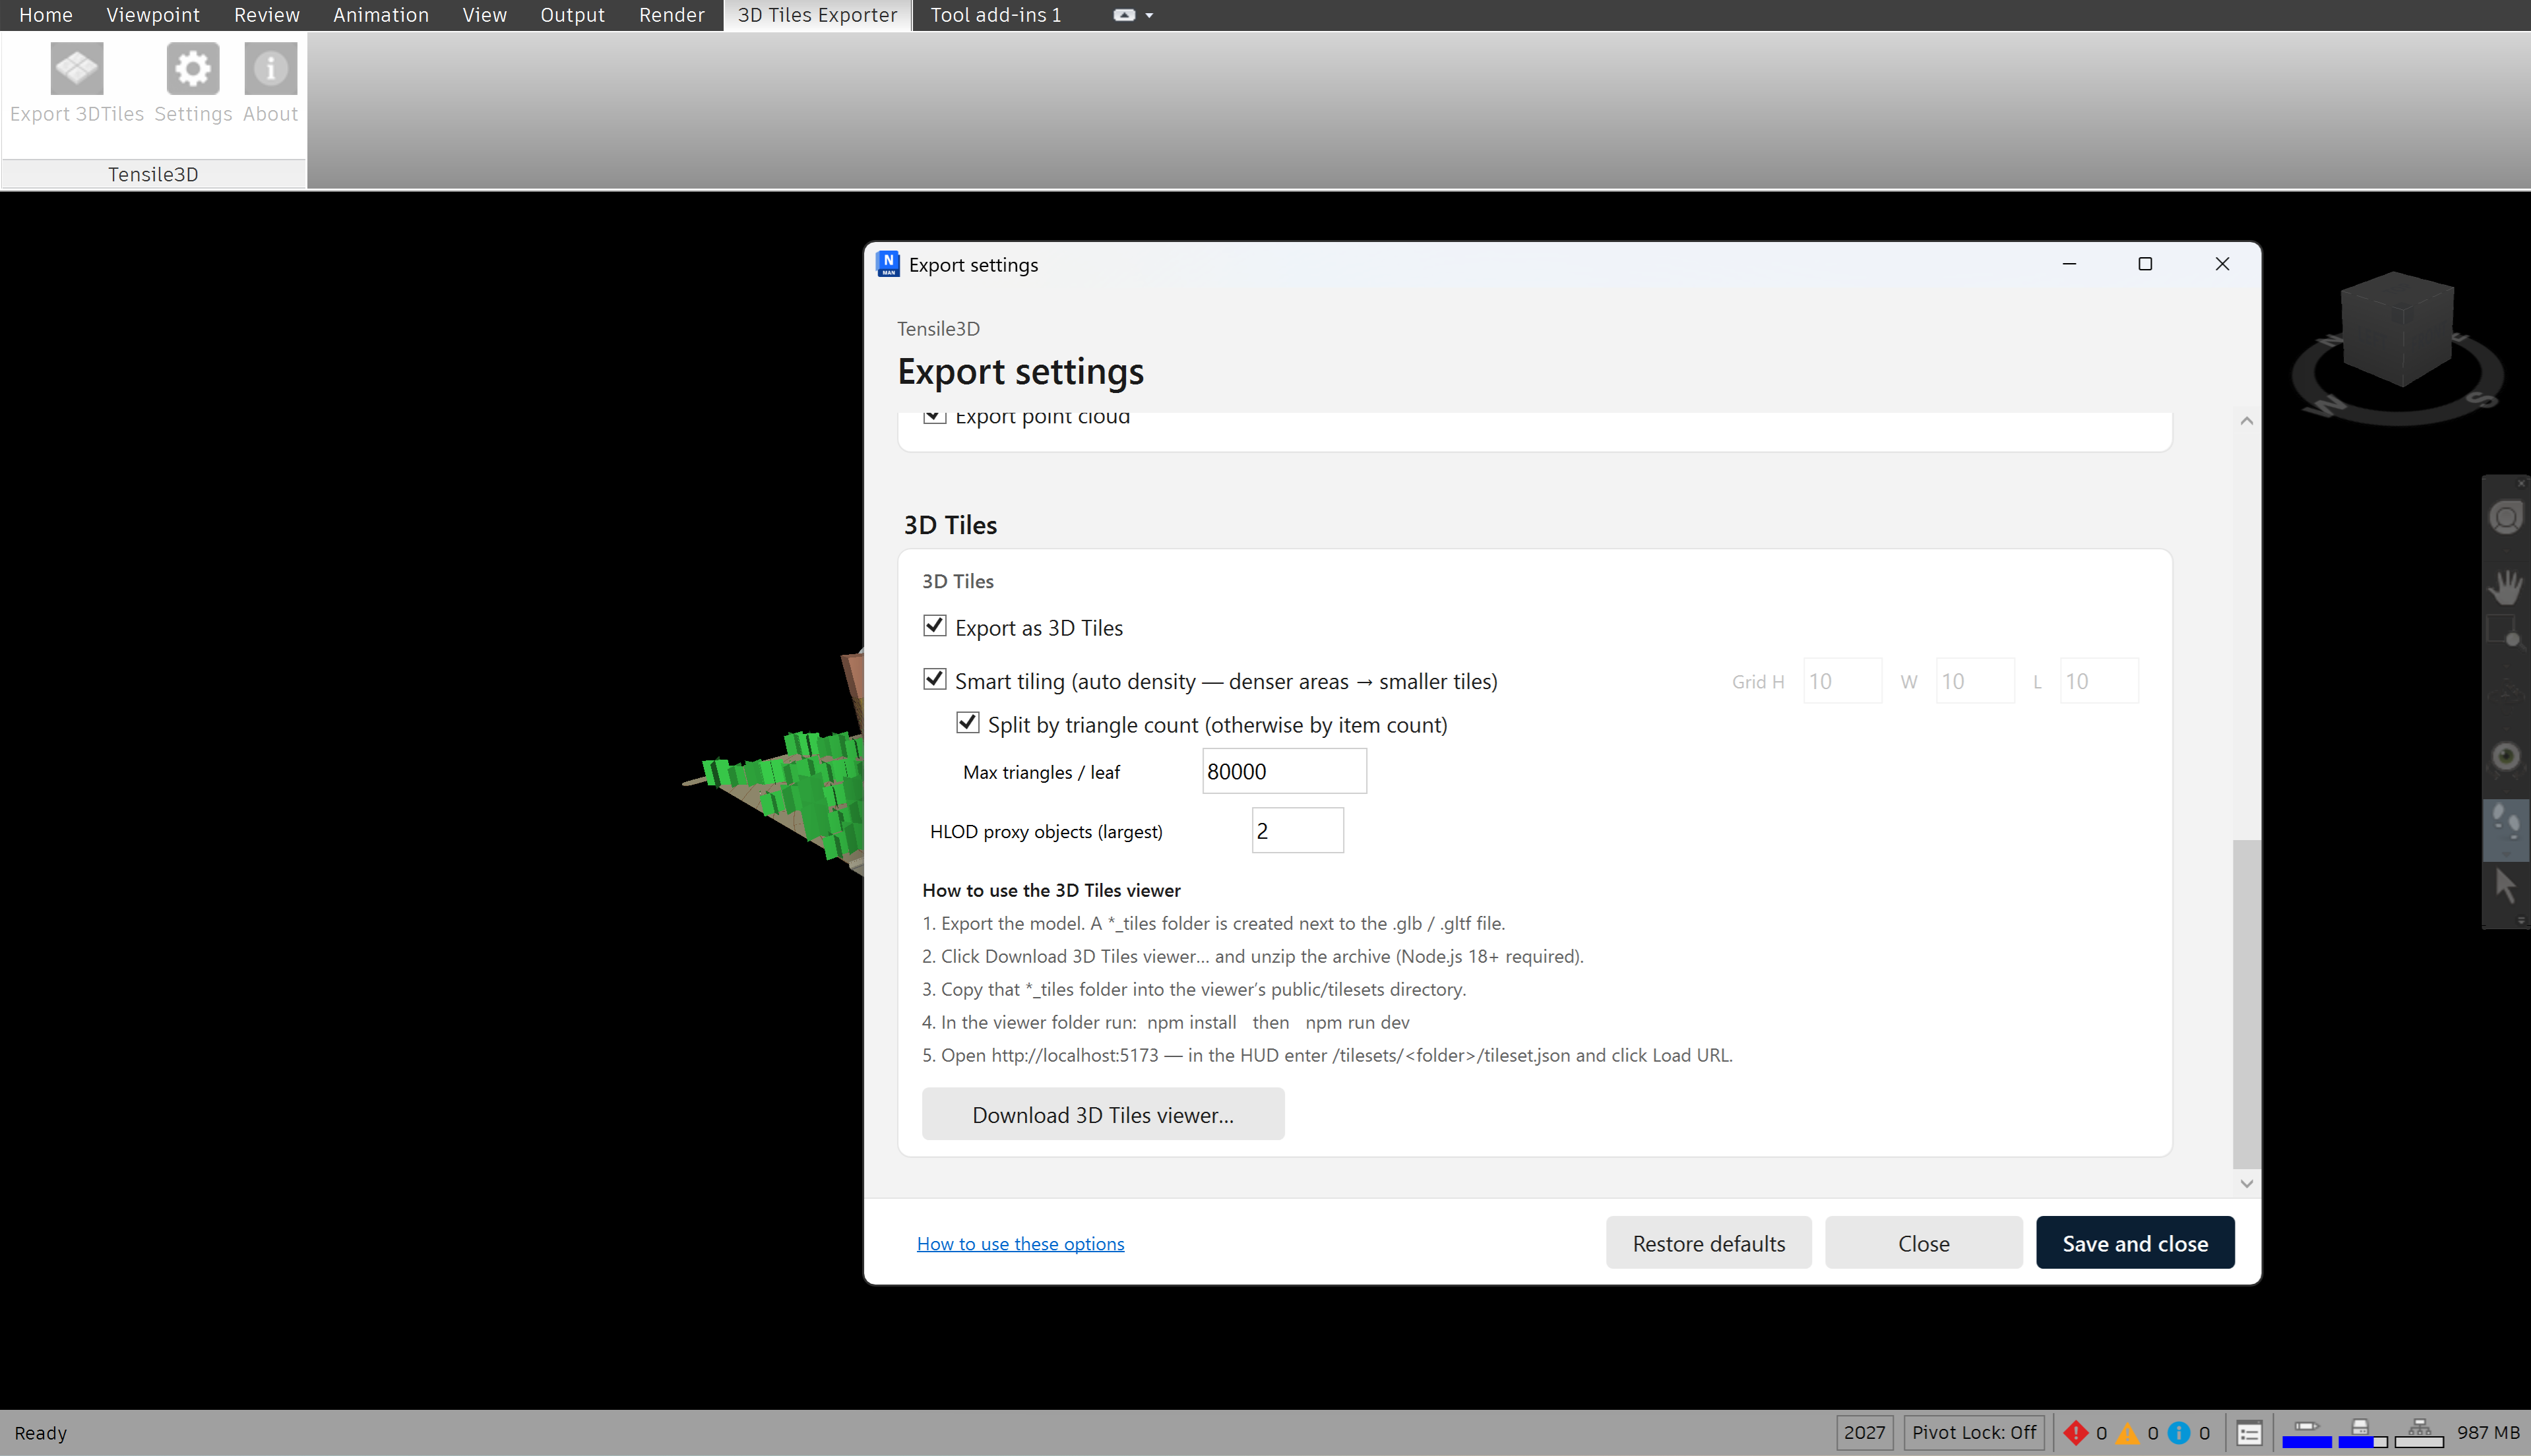
Settings dialog — tiling, origin, and quality options
Details about these settings
Linked from the plugin Settings dialog. These options control how large Navisworks models are tiled, oriented, and prepared for streaming viewers.
- Move origin to…
Checked by default at 0, 0, 0. Shifts the model so the chosen XYZ becomes the export origin — ideal for large coordinates and viewer centering.
- Export as 3D Tiles
On by default in the Tiles Exporter package. Writes a tileset.json plus GLB tile tree next to (or instead of) a single glTF.
- Smart tiling
Automatically subdivides dense regions. Turn off to set Grid H / W / L manually. Triangle-based mode caps triangles per leaf.
- Do not batch
Keeps each Navisworks item as its own mesh for picking. Unchecked batches by material for smaller, faster tiles.
- Flip YZ-Axis
Swaps Y and Z so exported models match the typical glTF / Three.js up-axis.
- Save 3D Tiles viewer…
Downloads the companion viewer source zip from About / Settings so you can preview exports immediately.
How to use
- Install the plugin bundle for your Navisworks year.
- Open a model and open the 3D Tiles Exporter ribbon tab.
- Optionally adjust Settings (Move origin, smart tiling, batching).
- Click Export 3DTiles and choose an output path.
- Drop the
*_tilesfolder on tensile3d.com/3d-viewer, or use Save 3D Tiles viewer… for a local copy.